Showing posts with label dies. Show all posts

Dollar Frame Creation

Some time ago, I bought this frame at Salvation Army. SA is my go-to place to find discarded items that I can breathe new life into. The frame had never been used and only cost me one measly dollar....just one dollar!
  I removed the back, glass, mat and the word "home".
 There was a thin sheet of styrofoam under the mat just to raise it up a bit, which I liked.
 I found a sheet of flowered scrapbook paper and glued it on to a piece of cardboard under the styrofoam. I printed out the verse on my computer then cut it out, using a rectangle die... but you could just cut it out with scissors too. I cut a slightly larger rectangle out of gold metallic cardstock, glued the verse and cardstock together and added some foam dots to the back to get a raised effect.
 For the bottom window, I used my Bigshot to cut out the vine and flower die cuts. I glued them into place and added some little metal centers.
This made a great gift for a dear friend!

Here's where I'll be sharing:
Happiness is Homemade   What's for Dinner   Nifty Thrifty Sunday  That DIY Party  Amaze Me Monday   Mix it up Monday  Make it Pretty Monday  Cooking and Crafting with J and J   Busy Monday  Keep it simple Monday  Show and Tell   Warm Heart  Tasty Tuesday  Dagmar's Home  Delicious Dishes  Talk of the town Waste Not Wednesday   Thrifty and Vintage Finds Share Your Style  Create it Thursday Creatively crafty  Full plate Thursday  The Handmade Hangout    Foodie Friday   Friday Features  Home Matters  Dare to share Sat   Saturday Shuffle  Saturday Sparks  Hello Fall linky party Wordless Wednesday
  Image-in-ing 

One Equals Four!

 The fact that I love papercrafts is an understatement.
 I  always have new ideas popping into my head quicker than I can make them and Pinterest is like an addiction for me! My friends and family even save the cards they receive for holidays and birthdays for me because I like to challenge myself to see how creative I can be. (And I hate to see those beautiful cards thrown away).
Recently, in one of these goody bags, I found a pretty card in shades of purple. I wanted to see how many cards I could make using parts of this one.
Inside of the card:


card1. I used the top part of the front of the card.
card 2. I used the upper right corner of the inside. I cut the corner using a curved die and added a small flower from the back of the card.
card 3. I used the bottom front of the card and added the "Thanks "sentiment from a scrap of pale green cardstock.
card 4. I used the small piece that was left as an edge panel.( I know, that was really stretching it!) lol


 One card equals four!!...let me know what you think.....
Here's where I'll be sharing:
Happiness is Homemade  * Sundays at Home  * Sunday's Best * Smell good Sunday * What's for Dinner  *  Nifty Thrifty Sunday * Family Joy * That DIY Party * Busy Creative You *
 Amaze Me Monday * Mix it up Monday * Make it Pretty Monday * Cooking and Crafting with J and J * Show and Share *  Busy Monday * Keep it simple Monday *Show and Tell *  Warm Heart * Totally Terrific Tuesday * Tasty Tuesday * Dagmar's Home * Delicious Dishes * Inspire my Creativity * Talk of the town* Waste Not Wednesday *  Thrifty and Vintage Finds  *What's Cookin' Wednesday  *Share Your Style * Create it Thursday *  Creatively crafty *  Full plate Thursday *  * The Handmade Hangout * The Pin Junkie * Friday Frenzy * Anything blue Friday * Foodie Friday * Foodie Friday and everything Else * Friday Features * Best Friday Features *  What To Do Weekends * Home Matters * Ultimate Pin Party * Dare to share Sat. * Saturday Shuffle * Saturday Sparks *  Best of the Weekend *

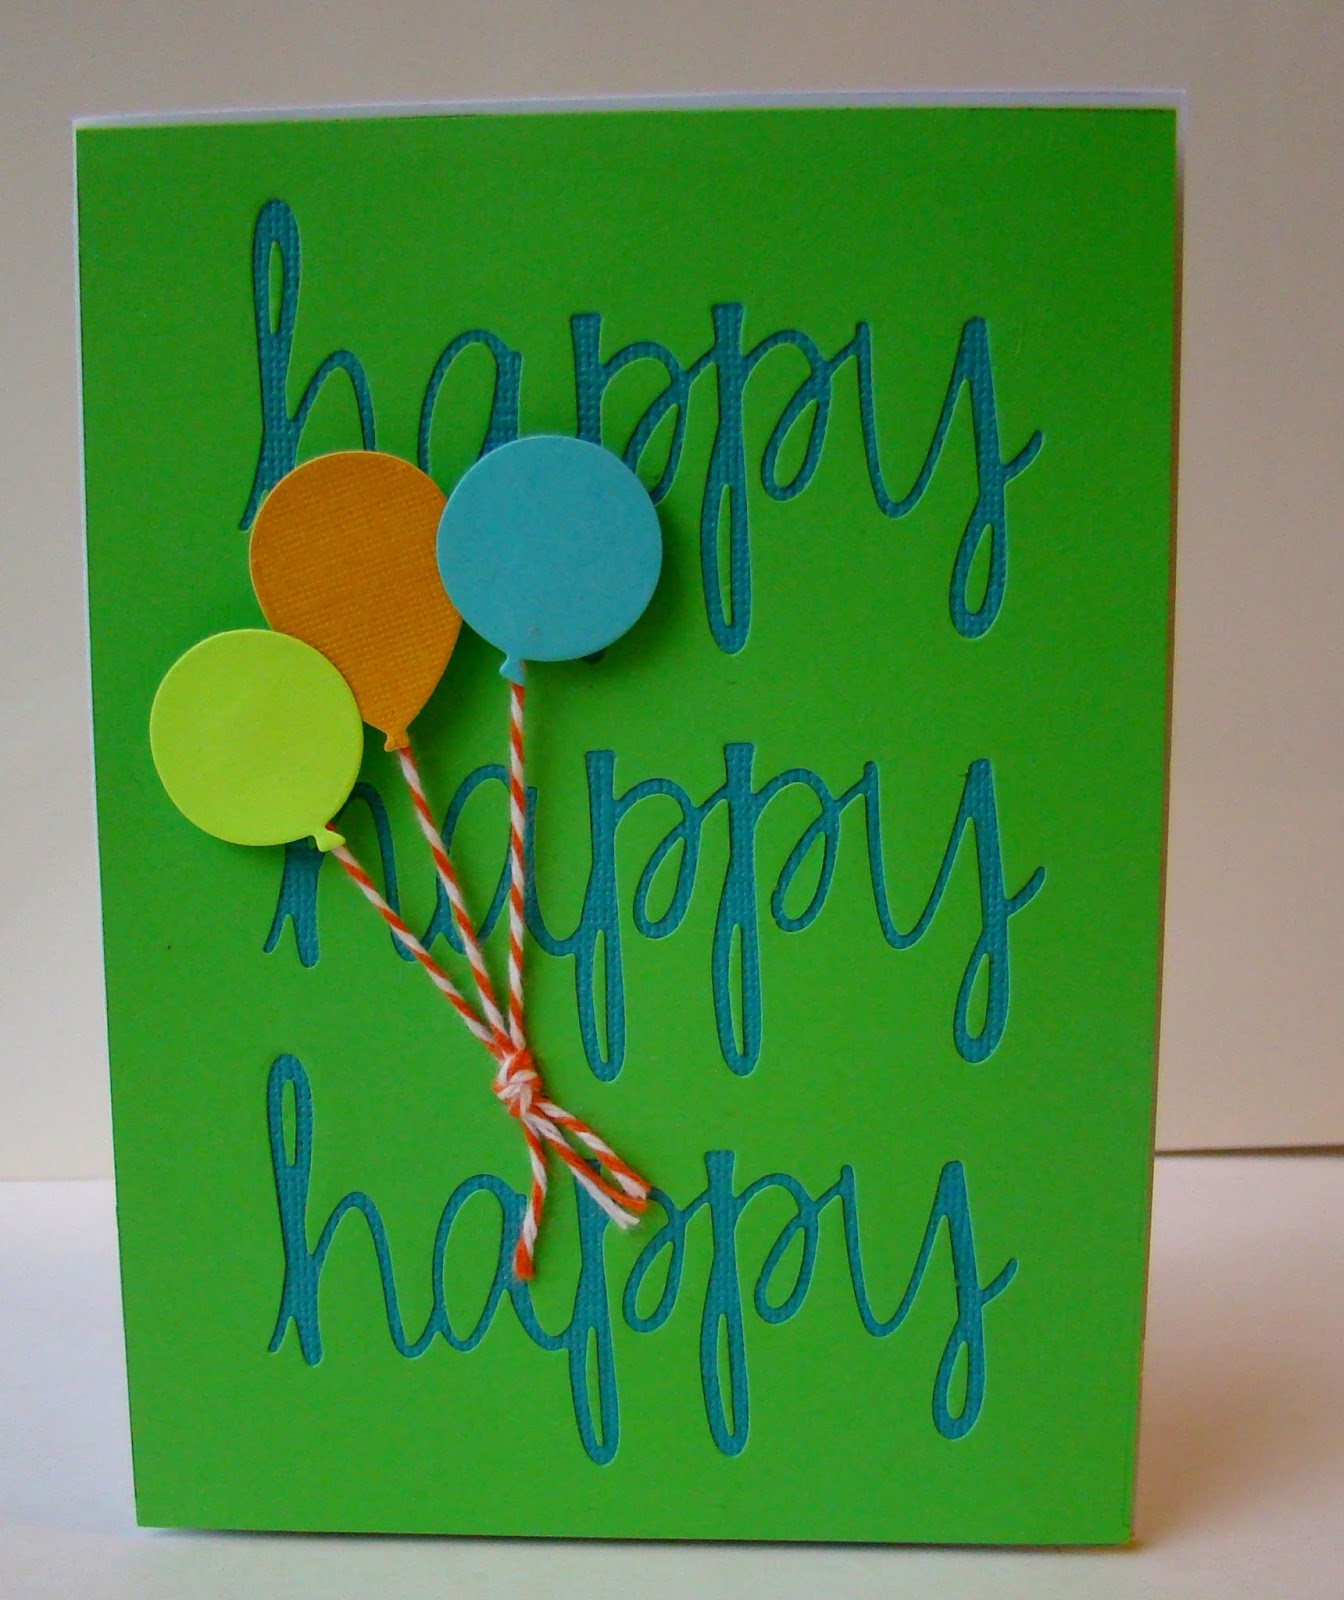
Happy, Happy, Happy!

I love using Avery Ellie-Ments sentiment dies! They're big and make a bold statement on the front of your cards.


I cut the "happy" sentiment out three times on the front of a piece of green card stock. Then I applied a piece of turquoise card stock to the back of the negative cut, to show through the cut out. I can keep my " three happy words" to use on other cards.
Next, I used the Paper Smoochy Balloon die to cut out some contrasting balloons and attach them together using twine. 

Then I adhered them to the card using some foam dots
 for a three-dimensional effect.

I'm using it again this year for Father's Day cards..

This happy sentiment could be used variety of occasions:
birthday, Mother's Day, Father's Day, graduation and the list goes on!

Here's where I'll be sharing:

 Amaze Me Monday * Mix it up Monday * Make it Pretty Monday * Cooking and Crafting with J and J *  Busy Monday * Keep it simple Monday * You're gonna love it Tuesday * Tasty Tuesday * Delicious Dishes * Inspire me Tuesday * Talk of the Town  * Waste not Wednesday *  Thrifty and Vintage Finds *Moonlight and Mason Jars * Before and After Wednesday * the Alder Collective * You Link it, We Make it * What's Cookin' Wednesday  * Create it Thursday *  Creatively crafty *  Full plate Thursday * Throwback Thursday * The Handmade Hangout * The Pin Junkie * Anything blue Friday *  Friday Finds * Foodie Friday *  Photo Friday * Friday Features * Party Palooza * Floral Friday Fotos  *  What To Do Weekends * Peace, love Link up Fridays *  Saturday Sparks *  Five star Frou Frou *  Best of the Weekend *  Happiness is Homemade  * Sundays at Home  * Sunday Crafters-noon *  Nifty Thrifty Sunday *